


How to Stencil a Throw Pillow | Custom Stenciled Nursery Pillow Project
Brighten your baby's life with this Custom Stenciled Nursery Throw Pillow Project from Designer Stencils.
What are the types of stencils?
At Designer Stencils, we make stencils for a variety of purposes, from interior design to home décor to personalizing unique gifts!
What to use for stenciling?
We have everything you need to for your stenciling project, including an incredible selection of stencils for all occasions and tastes, brushes, rollers, paints, adhesives, etc.
What paint to use for stenciling?
The type of paint you need depends on the application. We offer acrylic paints for indoor projects and patio paints for outdoor use. For fabrics, just mix a little Fabric Medium (available on our website) with the acrylic paint. Acrylic paint can also be for glass and whiteboards by mixing it with household dish soap.
Do you pull stencil off wet or dry?
It’s best to remove your stencil while the paint is wet. This will prevent dry, peeling paint from ruining the crisp, clean lines created by utilizing proper stenciling techniques.
How do you keep paint from bleeding under stencils?
It’s easy to prevent paint from bleeding underneath your stencil. Simply ensure that your brush or roller is barely wet with paint. This is achieved, after soaking the foam or bristles, by repeatedly swirling or rolling it onto a stack of paper towels prior to applying the paint through the stencil. Layer the color using numerous light coats.
Here's what you'll need:

- Custom Stencil featuring your words and/or graphics or call 1-800-334-1776
- Americana Acrylic Paint
- Cadmium Yellow
- Royal Fuchsia
- Slate Grey
- Americana Fabric Painting Medium
- 4" High Density Roller
- Repositionable Spray Adhesive
- Scrap Cardboard
- Scrap paper or plastic
- Paper Plates (or Paint Trays)
- Paper Towels
- Clothes Iron and Ironing Board
- Hair Dryer
- Piece of fabric (to cover sham during ironing)
Preparing the Stencil and Pillow Sham


First, take some Repositionable Spray Adhesive and spray the underside of your first stencil.


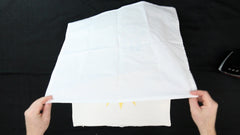
Next, cut a piece of cardboard slightly smaller than the sham and place it underneath.
This will help keep the area inside the seems nice and flat.


Position your stencil and slip some paper or plastic inside the sham to prevent the paint from bleeding through the other side.
Preparing the Paint


Thoroughly shake your bottle of Americana Acrylic Paint prior to pouring out a small amount onto a paper plate.
Next, add a equal amount of Fabric Medium and, using a stencil brush, mix until uniformly consistent.
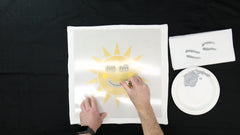
Stenciling


For large design elements, use a high density roller to apply the paint/medium mixture.
Apply the color using numerous light coats.


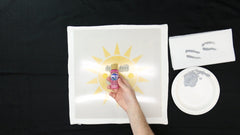
Once finished with the first color, lift away the stencil and allow the paint to dry.


Spray the underside of the next stencil and position it over the sham.
Mix the next color, in this case Slate Grey, with the Fabric Medium.
Use a stencil brush for smaller elements, making sure to first remove excess paint by swirling the bristles on a stack of paper towels.


Apply the color in using the same swirling motion.


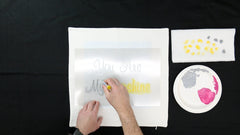
Switch to the last color and finish the remaining design elements on this side of the sham. Also, you can touch up any areas of the main color that need it using the a brush.
To speed up the drying process, use a hair dryer.
Stenciling the Flip Side


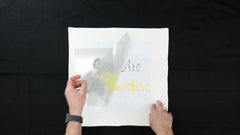
For a double-sided pillow, turn the sham over and place the next stencil.
Apply each paint mixture as you did earlier.
Locking in the Color and Finishing Up

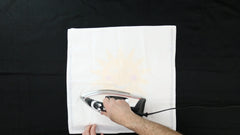


Lastly, place a piece of cloth over each side and heat using an iron without steam to lock in the color.
Place the insert inside the sham and your pillow is ready to add joy to any nursery!


