How to Stencil Easter Signs | Easter Four Piece Stenciled Sign Project
Spring into the holiday with this Four Piece Easter Stenciled Sign Project from Designer Stencils!
This fun project is the perfect way to add some style to your home this Easter. Old signs can refurbished with just a little bit of work or, if starting from scratch, unpainted signs can be purchased online.
What are the types of stencils?
At Designer Stencils, we make stencils for a variety of purposes, from interior design to home décor to personalizing unique gifts!
What to use for stenciling?
We have everything you need to for your stenciling project, including an incredible selection of stencils for all occasions and tastes, brushes, rollers, paints, adhesives, etc.
What paint to use for stenciling?
The type of paint you need depends on the application. We offer acrylic paints for indoor projects and patio paints for outdoor use. For fabrics, just mix a little Fabric Medium (available on our website) with the acrylic paint. Acrylic paint can also be for glass and whiteboards by mixing it with household dish soap.
Do you pull stencil off wet or dry?
It’s best to remove your stencil while the paint is wet. This will prevent dry, peeling paint from ruining the crisp, clean lines created by utilizing proper stenciling techniques.
How do you keep paint from bleeding under stencils?
It’s easy to prevent paint from bleeding underneath your stencil. Simply ensure that your brush or roller is barely wet with paint. This is achieved, after soaking the foam or bristles, by repeatedly swirling or rolling it onto a stack of paper towels prior to applying the paint through the stencil. Layer the color using numerous light coats.
Here's what you'll need:

- Four Piece Easter Stencil Set (multiple and custom sizes available)
- Americana Acrylic Paint
- Melon
- Mint Julep Green
- Kelly Green
- Slate Grey
- Payne Grey
- Titanium White
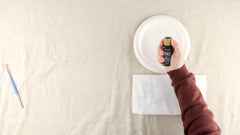
- Repositionable Spray Adhesive
- Stencil Brush
- Double-Ended Stencil Brush
- Frog Tape
- Gyro-Cut Craft and Hobby Cutting Tool
- Glad Press'n Seal
- Wood Stain
- Utility or Hobby Knife
- Small Flat Paint Brush
- Unfinished Square Wooden Frames (x4)


Trim excess tape using a utility or hobby knife. Next, use a putty knife to help press the tape tightly into the corners. Cover the entire background to protect it from the wood stain.


Apply the stain liberally while wearing protective gloves in a well-ventilated area. Take care that the brush is not too wet when applying stain close to the masked areas. This will help prevent the stain from seeping underneath the tape.
After applying the stain, use a clean rag to wipe away the excess oil.
Repeat the masking and staining procedure for all four frames.


Give the background a couple of coats of Americana Titanium White acrylic paint.


Cut pieces of tape the length of the background and use them to mask off a thin line centered along the marks you just made.
Continue creating lines on either side that are the same width as the original until you reach the left and right edge.
Add tape to the top and bottom to make all of the lines equal in length and to protect the frame itself.


After soaking the bristles thoroughly, remove excess paint by swirling the brush on a stack of paper towels. Too much paint on the brush will result in paint bleeding underneath the tape now (and later the stencils).
Apply the color using numerous light coats.
Once finished remove the tape and allow the green to dry.


Paint these new masked lines using Americana Melon.


Repeat for all of the stencil elements that will be painted Melon.


Position the stencil and paint as you did earlier when you did the stripes.
When finished, remove the stencil by pulling it straight up.


Stencil the arrow with the same green mixture as used earlier.


Cover the space where the eggs will go using the Titanium White paint in order to keep the stripes from showing through the final color.


Once the white is dry, fill in the egg backgrounds with the mint green paint, using the same stencil.


Do the same for the remaining melon egg elements. Use the Gyro Cutter to cut out small circles of tape to cover the center of the flower designs.


Last up are the whiskers, mouth, and eyes. Mask these and stencil them also using Payne Grey.
Your family and friends won't need to hunt for these whimsical Easter decorations!


